VueJS渲染
在本章中,我们将学习条件渲染和列表渲染。在条件渲染中,我们将讨论如何使用if,if-else,if-else-if,show等。在列表渲染中,我们将讨论如何使用for循环。
有条件的渲染
让我们开始并首先研究一个示例,以说明条件渲染的详细信息。使用条件渲染时,我们只希望在满足条件并且在if,if-else,if-else-if,show等帮助下完成条件检查时输出。
v-if
<html>
    <head>
        <title>VueJs Instance</title>
        <script type = "text/javascript" src = "js/vue.js"></script>
    </head>
    <body>
        <div id = "databinding">
            <button v-on:click = "showdata" v-bind:style = "styleobj">Click Me</button>
            <span style = "font-size:25px;"><b>{{show}}</b></span>
            <h1 v-if = "show">This is h1 tag</h1>
            <h2>This is h2 tag</h2>
        </div>
        <script type = "text/javascript">
            var vm = new Vue({
                el: '#databinding',
                data: {
                    show: true,
                    styleobj: {
                        backgroundColor: '#2196F3!important',
                        cursor: 'pointer',
                        padding: '8px 16px',
                        verticalAlign: 'middle',
                    }
                },
                methods : {
                    showdata : function() {
                        this.show = !this.show;
                    }
                },
            });
        </script>
    </body>
</html>
在上面的示例中,我们创建了一个按钮和两个带有消息的h1标签。
声明了一个名为show的变量,并将其初始化为true值。它显示在靠近按钮的位置。单击按钮,我们正在调用一个方法 showdata ,可切换变量show的值。这意味着在单击按钮时,变量show的值将从true更改为false,从false更改为true。
如下面的代码片段所示,我们已经将if分配给了h1标签。
<button v-on:click = "showdata" v-bind:style = "styleobj">Click Me</button>
<h1 v-if = "show">This is h1 tag</h1>
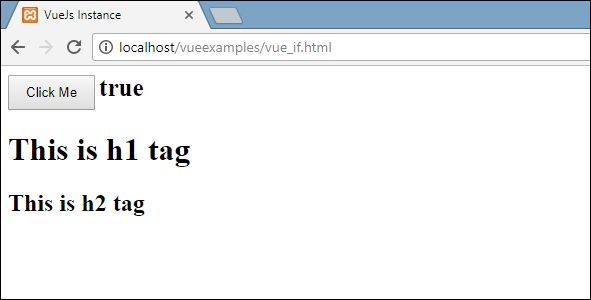
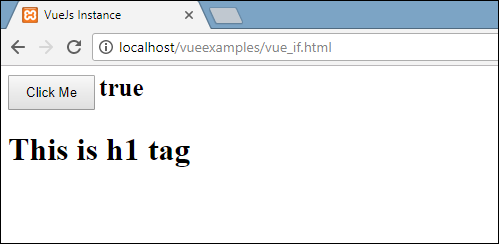
现在它将要做的是,它将检查变量show的值,如果其值为true,则将显示h1标签。单击按钮并在浏览器中查看,因为show变量的值更改为false,所以h1标记不会显示在浏览器中。仅在show变量为true时显示。
以下是浏览器中的显示。
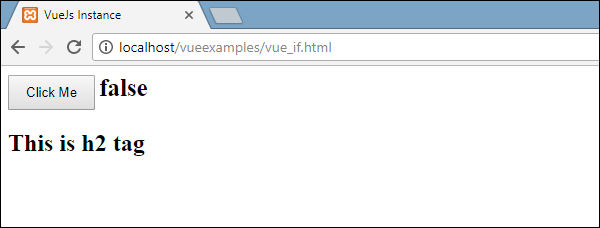
如果我们在浏览器中签到,这就是show为false时得到的结果。
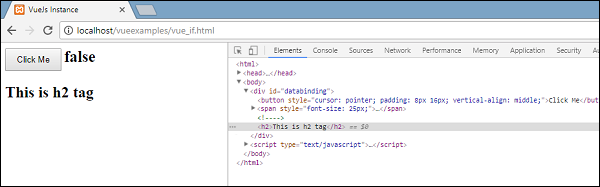
当变量show设置为false时,将从DOM中删除h1标签。

这是当变量为true时看到的。 当变量show设置为true时,会将h1标签添加回DOM。
v-else
在以下示例中,我们将v-else添加到了第二个h1标签。
<html>
    <head>
        <title>VueJs Instance</title>
        <script type = "text/javascript" src = "js/vue.js"></script>
    </head>
    <body>
        <div id = "databinding">
            <button v-on:click = "showdata" v-bind:style = "styleobj">Click Me</button>
            <span style = "font-size:25px;"><b>{{show}}</b></span>
            <h1 v-if = "show">This is h1 tag</h1>
            <h2 v-else>This is h2 tag</h2>
        </div>
        <script type = "text/javascript">
            var vm = new Vue({
                el: '#databinding',
                data: {
                    show: true,
                    styleobj: {
                        backgroundColor: '#2196F3!important',
                        cursor: 'pointer',
                        padding: '8px 16px',
                        verticalAlign: 'middle',
                    }
                },
                methods : {
                    showdata : function() {
                        this.show = !this.show;
                    }
                },
            });
        </script>
    </body>
</html>
使用以下代码段添加v-else。
<h1 v-if = "show">This is h1 tag</h1>
<h2 v-else>This is h2 tag</h2>
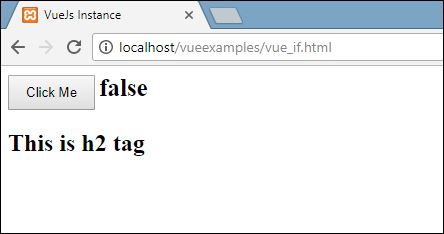
现在,如果显示为真 “这是h1标签” 将显示,如果为false “这是h2标签” 将显示。这就是我们将在浏览器中获得的。
以上显示是当show变量为true时。由于我们添加了v-else,因此第二条语句不存在。现在,当我们单击按钮时,show变量将变为false,并且第二条语句将显示,如以下屏幕截图所示。
v-show
v-show的行为与v-if相同。它还根据分配的条件显示和隐藏元素。 v-if和v-show之间的区别在于,如果条件为false,则v-if从DOM中删除HTML元素,如果条件为true,则将其重新添加。如果条件为false且display:none,则v-show隐藏元素。如果条件为真,它将向后显示元素。因此,该元素始终存在于dom中。
<html>
    <head>
        <title>VueJs Instance</title>
        <script type = "text/javascript" src = "js/vue.js"></script>
    </head>
    <body>
        <div id = "databinding">
            <button v-on:click = "showdata" v-bind:style = "styleobj">Click Me</button>
            <span style = "font-size:25px;"><b>{{show}}</b></span>
            <h1 v-if = "show">This is h1 tag</h1>
            <h2 v-else>This is h2 tag</h2>
            <div v-show = "show">
                <b>V-Show:</b>
                <img src = "images/img.jpg" width = "100" height = "100" />
            </div>
        </div>
        <script type = "text/javascript">
            var vm = new Vue({
                el: '#databinding',
                data: {
                    show: true,
                    styleobj: {
                        backgroundColor: '#2196F3!important',
                        cursor: 'pointer',
                        padding: '8px 16px',
                        verticalAlign: 'middle',
                    }
                },
                methods : {
                    showdata : function() {
                        this.show = !this.show;
                    }
                },
            });
        </script>
    </body>
</html>
使用以下代码段将v-show分配给HTML元素。
<div v-show = "show"><b>V-Show:</b><img src = "images/img.jpg" width = "100" height = "100" /></div>
我们使用了相同的变量show,并且基于它的true / false,图像显示在浏览器中。
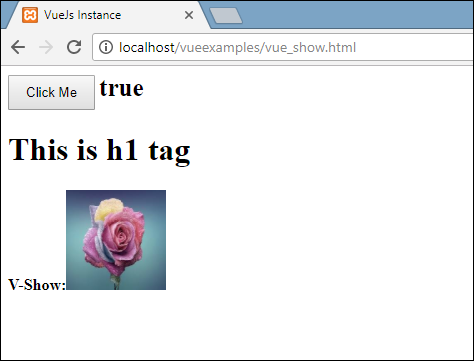
现在,由于变量show为true,因此图像如上面的屏幕快照所示。让我们单击按钮并查看显示。
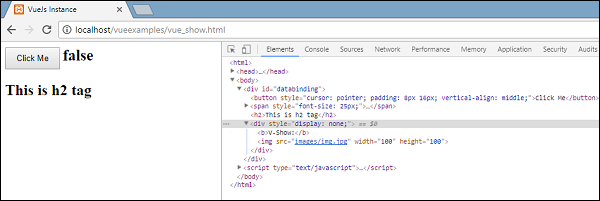
变量show为false,因此图像被隐藏。如果我们检查并看到该元素,则div和图像仍然是DOM的一部分,并且具有style属性显示:如上面的屏幕快照所示,没有div。
列表渲染
v-for
现在让我们讨论使用v-for指令的列表呈现。
<html>
    <head>
        <title>VueJs Instance</title>
        <script type = "text/javascript" src = "js/vue.js"></script>
    </head>
    <body>
        <div id = "databinding">
            <input type = "text" v-on:keyup.enter = "showinputvalue"
                v-bind:style = "styleobj" placeholder = "Enter Fruits Names"/>
            <h1 v-if = "items.length>0">Display Fruits Name</h1>
            <ul>
                <li v-for = "a in items">{{a}}</li>
            </ul>
        </div>
        <script type = "text/javascript">
            var vm = new Vue({
                el: '#databinding',
                data: {
                    items:[],
                    styleobj: {
                        width: "30%",
                        padding: "12px 20px",
                        margin: "8px 0",
                        boxSizing: "border-box"
                    }
                },
                methods : {
                    showinputvalue : function(event) {
                        this.items.push(event.target.value);
                    }
                },
            });
        </script>
    </body>
</html>
称为项的变量声明为数组。在方法中,有一个称为 showinputvalue ,分配给采用水果名称的输入框。在该方法中,使用以下代码将在文本框中输入的水果添加到数组中。
showinputvalue : function(event) {
    this.items.push(event.target.value);
}
我们使用v-for来显示输入的结果,如下面的代码所示。 V-for帮助迭代数组中存在的值。
<ul>
    <li v-for = "a in items">{{a}}</li>
</ul>
要使用for循环遍历数组,我们必须使用v-for =“ a in items”,其中a保存数组中的值,并显示直到所有项都完成为止。
以下是浏览器中的输出。
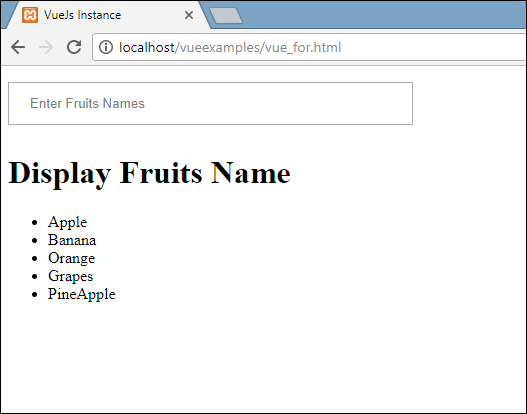
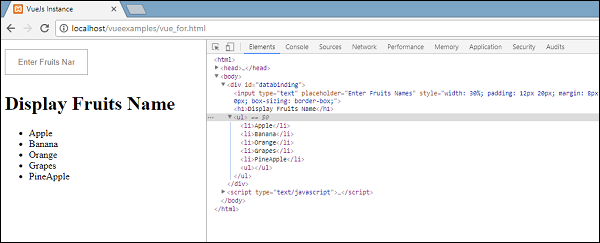
在检查项目时,这就是它在浏览器中显示的内容。在DOM中,我们看不到li元素的任何v-for指令。它显示没有任何VueJS指令的DOM。
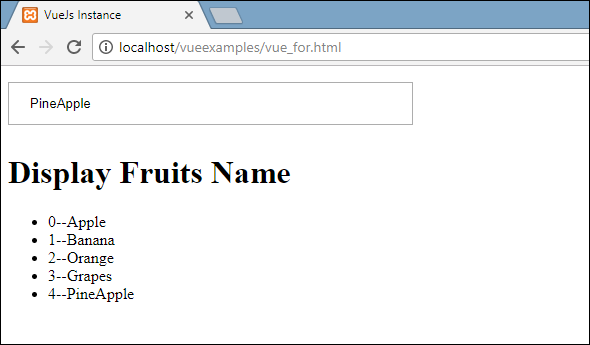
如果我们希望显示数组的索引,可以使用以下代码完成。
<html>
    <head>
        <title>VueJs Instance</title>
        <script type = "text/javascript" src = "js/vue.js"></script>
    </head>
    <body>
        <div id = "databinding">
            <input type = "text" v-on:keyup.enter = "showinputvalue"
                v-bind:style = "styleobj" placeholder = "Enter Fruits Names"/>
            <h1 v-if = "items.length>0">Display Fruits Name</h1>
            <ul>
                <li v-for = "(a, index) in items">{{index}}--{{a}}</li>
            </ul>
        </div>
        <script type = "text/javascript">
            var vm = new Vue({
                el: '#databinding',
                data: {
                    items:[],
                    styleobj: {
                        width: "30%",
                        padding: "12px 20px",
                        margin: "8px 0",
                        boxSizing: "border-box"
                    }
                },
                methods : {
                    showinputvalue : function(event) {
                        this.items.push(event.target.value);
                    }
                },
            });
        </script>
    </body>
</html>
为了获得索引,我们在括号中添加了另一个变量,如以下代码所示。
<li v-for = "(a, index) in items">{{index}}--{{a}}</li>
在(索引)中, a 是值和 index 是关键。现在,浏览器显示将如以下屏幕快照所示。因此,借助索引可以显示任何特定值。