Angular 4 动画
动画在 html 元素之间添加了很多交互。 Angular2 也可以使用动画。与 Angular 4 的不同之处在于动画不再是 @角/核心 库,但是是一个单独的包,需要导入 app.module.ts .
首先,我们需要按如下方式导入库:
import { BrowserAnimationsModule } from '@angular/platform-browser/animations';
The 浏览器动画模块 需要添加到导入数组中 app.module.ts 如下所示:
app.module.ts
import { BrowserModule } from '@angular/platform-browser';
import { NgModule } from '@angular/core';

import { BrowserAnimationsModule } from '@angular/platform-browser/animations';
import { AppComponent } from './app.component';

@NgModule({
    declarations: [
        AppComponent
    ],
    imports: [
        BrowserModule,
        BrowserAnimationsModule
    ],
    providers: [],
    bootstrap: [AppComponent]
})
export class AppModule { }
In app.component.html ,我们添加了要进行动画处理的 html 元素。
<div>
    <button (click)="animate()">Click Me</button>
    <div [@myanimation] = "state" class="rotate">
        <img src="assets/images/img.png" width="100" height="100">
    </div>
</div>
对于主 div,我们添加了一个按钮和一个带有图像的 div。有一个调用 animate 函数的点击事件。而对于 div, @myanimation 添加指令并将值作为状态。
现在让我们看看 app.component.ts 定义动画的地方。
import { Component } from '@angular/core';
import { trigger, state, style, transition, animate } from '@angular/animations';

@Component({
    selector: 'app-root',
    templateUrl: './app.component.html',
    styleUrls: ['./app.component.css'],
    styles:[`
        div{
            margin: 0 auto;
            text-align: center;
            width:200px;
        }
        .rotate{
            width:100px;
            height:100px;
            border:solid 1px red;
        }
    `],
    animations: [
        trigger('myanimation',[
            state('smaller',style({
                transform : 'translateY(100px)'
            })),
            state('larger',style({
                transform : 'translateY(0px)'
            })),
            transition('smaller <=> larger',animate('300ms ease-in'))
        ])
    ]
})

export class AppComponent {
    state: string = "smaller";
    animate() {
        this.state= this.state == 'larger' ? 'smaller' : 'larger';
    }
}
我们必须导入要在 .ts 文件中使用的动画功能,如上所示。
import { trigger, state, style, transition, animate } from '@angular/animations';
在这里,我们从@angular/animations 导入了触发器、状态、样式、过渡和动画。
现在,我们将动画属性添加到@Component() 装饰器中:
animations: [
    trigger('myanimation',[
        state('smaller',style({
            transform : 'translateY(100px)'
        })),
        state('larger',style({
            transform : 'translateY(0px)'
        })),
        transition('smaller <=> larger',animate('300ms ease-in'))
    ])
]
触发器定义动画的开始。它的第一个参数是要赋予需要应用动画的 html 标记的动画名称。第二个参数是我们导入的函数——状态、转换等。
The state 功能涉及动画步骤,元素将在这些步骤之间转换。现在我们已经定义了两个状态,更小和更大。对于较小的状态,我们给出了样式 变换:translateY(100px) and 变换:translateY(100px) .
过渡函数将动画添加到 html 元素。第一个参数采用状态,即开始和结束;第二个参数接受 animate 函数。 animate 函数允许你定义过渡的长度、延迟和缓动。
现在让我们看看 .html 文件,看看转换函数是如何工作的
<div>
    <button (click)="animate()">Click Me</button>
    <div [@myanimation] = "state" class="rotate">
        <img src="assets/images/img.png" width="100" height="100">
    </div>
</div>
中添加了一个样式属性 @零件 指令,它集中对齐 div。让我们考虑下面的例子来理解相同的:
styles:[`
    div{
        margin: 0 auto;
        text-align: center;
        width:200px;
    }
    .rotate{
        width:100px;
        height:100px;
        border:solid 1px red;
    }
`],
在这里,特殊字符 [``] 用于向 html 元素添加样式(如果有)。对于 div,我们给出了 app.component.ts 文件中定义的动画名称。
单击按钮时,它会调用 animate 函数,该函数在 app.component.ts 文件中定义如下:
export class AppComponent {
    state: string = "smaller";
    animate() {
        this.state= this.state == ‘larger’? 'smaller' : 'larger';
    }
}
状态变量已定义并被赋予较小的默认值。 animate 函数在单击时更改状态。如果状态较大,它将转换为较小;如果更小,它将转换为更大。
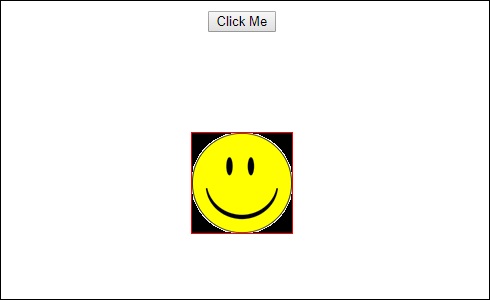
这就是浏览器中的输出( http://localhost:4200/ ) 看起来像:
点击后 Click Me 按钮,图像的位置发生改变,如下图所示:
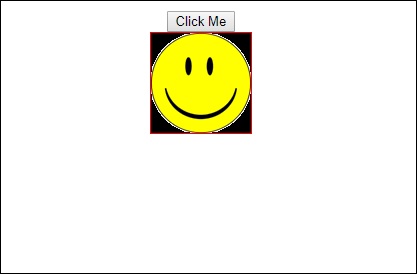
变换函数应用于 y 方向,当单击 Click Me 按钮时,从 0 更改为 100px。图像存储在 资产/图像 folder.