CouchDB 安装
本章教你如何在 Windows 和 Linux 系统中安装 CouchDB。
在 Windows 中安装 CouchDB
下载沙发数据库
CouchDB 的官方网站是 https://couchdb.apache.org .如果你点击给定的链接,你可以得到 CouchDB 官网的主页,如下图所示。

如果你单击下载按钮,将进入一个页面,其中提供各种格式的 CouchDB 下载链接。以下快照说明了相同的情况。
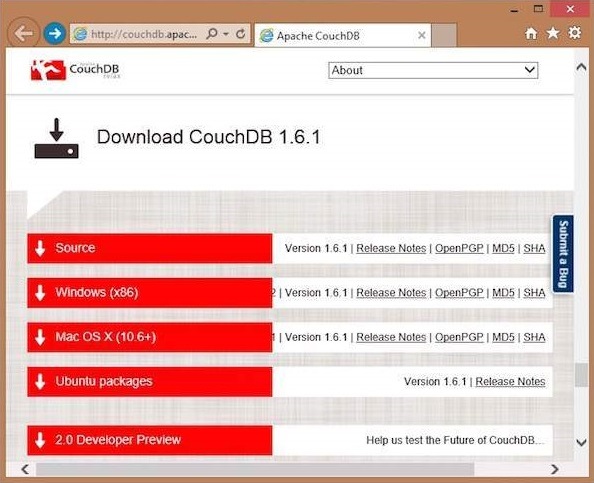
选择 Windows 系统的下载链接,然后选择提供的镜像之一开始下载。
安装 CouchDB
CouchDB 将以安装文件的形式下载到你的系统,名为 设置-couchdb-1.6.1_R16B02.exe。 运行安装文件并继续 安装。
安装完成后,通过访问以下命令打开 CouchDB 的内置 Web 界面 链接:http://127.0.0.1:5984/。 如果一切顺利,这将为你提供一个网页,该网页具有以下输出。
{
    "couchdb":"Welcome","uuid":"c8d48ac61bb497f4692b346e0f400d60",
    "version":"1.6.1",
    "vendor":{
        "version":"1.6.1","name":"The Apache Software Foundation"
    }
}
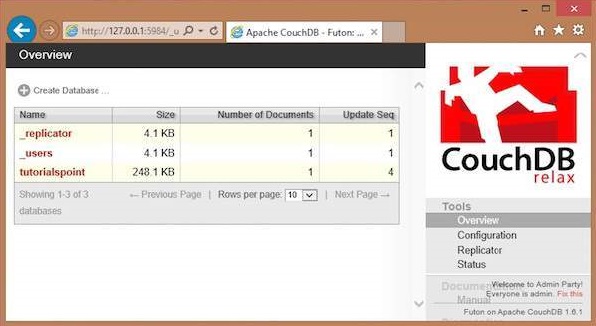
你可以使用以下 url 与 CouchDB Web 界面进行交互:
http:// 127.0.0.1:5984/_utils/
这显示了 Futon 的索引页面,它是 CouchDB 的 Web 界面。
在 Linux 系统中安装 CouchDB
对于许多 Linux 风格的系统,它们在内部提供 CouchDB。要安装此 CouchDB,请按照说明进行操作。
在 Ubuntu 和 Debian 上可以使用:
sudo aptitude install couchdb
在 Gentoo Linux 上有一个可用的 CouchDB ebuild:
sudo emerge couchdb
如果你的 Linux 系统没有 CouchDB,请按照下一部分安装 CouchDB 及其依赖项。
安装 CouchDB 依赖项
以下是要安装以在你的系统中获取 CouchDB 的依赖项列表 -
- 二郎一次性密码
- ICU
- OpenSSL
- Mozilla 蜘蛛猴
- GNU Make
- GNU 编译器集合
- libcurl
- help2man
- 用于文档的 Python
- Python狮身人面像
要安装这些依赖项,请在终端中键入以下命令。这里我们使用的是 Centos 6.5,以下命令将安装与 Centos 6.5 兼容的所需软件。
$sudo yum install autoconf
$sudo yum install autoconf-archive
$sudo yum install automake
$sudo yum install curl-devel
$sudo yum install erlang-asn1
$sudo yum install erlang-erts
$sudo yum install erlang-eunit
$sudo yum install erlang-os_mon
$sudo yum install erlang-xmerl
$sudo yum install help2man
$sudo yum install js-devel
$sudo yum install libicu-devel
$sudo yum install libtool
$sudo yum install perl-Test-Harness
注意: 对于所有这些命令,你需要使用 sudo。以下过程将普通用户转换为 sudoer。
-
以管理员用户身份登录
-
Open sudo 文件使用以下命令:
visudo
- 然后编辑如下图,给你现有的用户 sudoer 权限:
Hadoop All=(All) All , and press esc : x to write the changes to the file.
下载系统中的所有依赖项后,按照给定的说明下载 CouchDB。
下载 CouchDB
Apache 软件基金会不会为 CouchDB 提供完整的 .tar 文件, 所以你必须从源头安装它。
创建一个新目录来安装 CouchDB,浏览到创建的目录并通过执行以下命令下载 CouchDB 源:
$ cd
$ mkdir CouchDB
$ cd CouchDB/
$ wget
http:// www.google.com/url?q=http%3A%2F%2Fwww.apache.org%2Fdist%2Fcouchdb%2Fsource%2F1.6.1%2Fapache-couchdb-1.6.1.tar.gz
这会将 CouchDB 源文件下载到你的系统中。现在解压 apache-couchdb-1.6.1.tar.gz 如下所示。
$ tar zxvf apache-couchdb-1.6.1.tar.gz
配置 CouchDB
要配置 CouchDB,请执行以下操作:
- 浏览到 CouchDB 的主文件夹。
- 以超级用户身份登录。
- 使用 ./configure 提示进行配置,如下图:
$ cd apache-couchdb-1.6.1
$ su
Password:
# ./configure --with-erlang=/usr/lib64/erlang/usr/include/
它为你提供了类似于下面显示的以下输出,并带有结论 线路说: 你已经配置了 Apache CouchDB,是时候放松一下了 .
# ./configure --with-erlang=/usr/lib64/erlang/usr/include/

checking for a BSD-compatible install... /usr/bin/install -c
checking whether build environment is sane... yes
checking for a thread-safe mkdir -p... /bin/mkdir -p
checking for gawk... gawk
checking whether make sets $(MAKE)... yes
checking how to create a ustar tar archive... gnutar
………………………………………………………..
……………………….
config.status: creating var/Makefile
config.status: creating config.h
config.status: config.h is unchanged
config.status: creating src/snappy/google-snappy/config.h
config.status: src/snappy/google-snappy/config.h is unchanged
config.status: executing depfiles commands
config.status: executing libtool commands

You have configured Apache CouchDB, time to relax.

Run `make && sudo make install' to install.
安装 CouchDB
现在键入以下命令在你的系统中安装 CouchDB。
# make && sudo make install
它会在你的系统中安装 CouchDB,最后一行是: 你已经安装了 Apache CouchDB,是时候放松一下了 .
启动 CouchDB
要启动 CouchDB,请浏览到 CouchDB 主文件夹并使用以下命令:
$ cd apache-couchdb-1.6.1
$ cd etc
$ couchdb start
它启动 CouchDB 并给出以下输出:
Apache CouchDB 1.6.1 (LogLevel=info) is starting.
Apache CouchDB has started. Time to relax.
[info] [lt;0.31.0gt;] Apache CouchDB has started on http:// 127.0.0.1:5984/
[info] [lt;0.112.0gt;] 127.0.0.1 - - GET / 200
[info] [lt;0.112.0gt;] 127.0.0.1 - - GET /favicon.ico 200
确认
由于 CouchDB 是一个 Web 界面,因此请尝试在浏览器中键入以下主页 url。
http:// 127.0.0.1:5984/
它产生以下输出:
{
    "couchdb":"Welcome",
    "uuid":"8f0d59acd0e179f5e9f0075fa1f5e804",
    "version":"1.6.1",
    "vendor":{
        "name":"The Apache Software Foundation",
        "version":"1.6.1"
    }
}